
I have a confession that may surprise some of you: I make cheesecakes professionally. I bake and sell cheesecakes—everything from Caramel Apple and Dark Chocolate topped with raspberry coulis to Dark Chocolate with crystallized ginger and rum sauce, plus classic New York and homestyle styles. They turn out wonderfully, even though I learned by trial and error rather than formal pastry training. My customers often tell me these are the best cheesecakes they’ve ever tasted. The texture is silky, smooth, and meltingly tender, and the secret to that sublime result is simpler than you might think.
I routinely ignore many conventional cheesecake rules. I don’t pre-bake the crust, I skip the traditional water bath technique, I don’t fuss over gentle handling of the cream cheese, and I bake at a lower temperature than most recipes recommend. It shouldn’t work—but it does. I’ve converted skeptics into cheesecake lovers with this method.
This recipe is one I’ve made countless times and adapted for different sizes. It’s a versatile basic cheesecake that can be served plain or dressed up with chocolate ganache, fresh berries, fruit sauces, or dulce de leche. Turning it into individual servings is especially handy for gatherings: you can offer a topping bar so guests can customize their own. The batch below yields 22 individual cheesecakes—perfect for entertaining. If you’re not serving them right away, the leftovers freeze well when tightly wrapped and stored in a freezer bag, making “midnight cheesecake” a very real possibility.
Yes, you can make this quickly and reliably. It’s forgiving—unless you deliberately omit major ingredients. Don’t be intimidated; cheesecake wants to be your friend.
Many people tell me cheesecake is too complicated to make at home, but that’s more marketing than reality. I’m sharing this recipe because it’s reliably excellent and easy enough for home bakers. If you prefer a printer-friendly, photo-free version, there’s a separate printable recipe available on my site.
Baby Grand Marnier Cheesecakes
Yield: 22 individual cheesecakes
Ingredients:
1 cup graham cracker crumbs (place several graham crackers in a zipper-top bag and crush them until most crumbs are the size of rice or smaller)
6 tablespoons butter
1/3 cup plus 3/4 cup granulated sugar, divided
3 (8 oz.) packages cream cheese, softened
3 large eggs
4 tablespoons Grand Marnier (or another orange liqueur)
1 tablespoon pure vanilla extract
Instructions:
Place a rack in the center of the oven and preheat to 300°F. Put an empty metal cake pan (do not use glass) on the oven floor. Meanwhile, bring a kettle of water to a boil.
Place the butter in a microwave-safe bowl and heat on high for about 30 seconds, until melted. Stir in 1/3 cup of the sugar, then add the graham cracker crumbs and toss with a fork until evenly coated.
Grease 22 muffin cups with butter or non-stick spray. Use metal or silicone cups; if using metal, line with paper cupcake liners. If using silicone cups, set them on a sheet pan. Add about 1 tablespoon of the graham cracker mixture to each cup and press firmly to form a compact crust. Any leftover crumb mixture can be stored in a zipper-top bag in the freezer.
Fit the bowl of a food processor with the standard blade. Add the cream cheese, remaining 3/4 cup sugar, eggs, Grand Marnier, and vanilla extract. Process until smooth, scraping the sides as needed, and process again to fully incorporate. The batter should be about the consistency of custard or thick eggnog—relatively loose.
Divide the batter evenly among the prepared muffin cups, filling nearly to the top and leaving about 1/8″ headspace. If you want perfectly smooth tops, lift and tap the sheet pan on the counter several times and let rest for five minutes to release air bubbles; this step is optional.
Carefully pour the boiling water into the metal pan on the oven floor to create steam. Place the sheet pan or muffin tin on the center rack and bake for 18–22 minutes, checking after 15 minutes. The cheesecakes are done when the centers still wobble slightly but the edges are set and the tops look wet. If they appear dry or cracked, they have been overbaked.
Remove the cheesecakes from the oven and let them cool at room temperature for about 45 minutes—the wet, glossy appearance on top is desirable. If you used paper liners, remove the cheesecakes from the tin and place them on a plate. If you used silicone cups, simply transfer the cups to a plate. Cover loosely with plastic wrap and chill thoroughly in the refrigerator for at least 6 hours before serving.
To serve, unmold the cheesecakes from the liners and arrange them on a platter with a selection of toppings such as dulce de leche, chocolate sauce or ganache, diced fresh fruit, fruit coulis, or compotes. They’re also delightful served plain.
Topped with strawberry freezer jam.
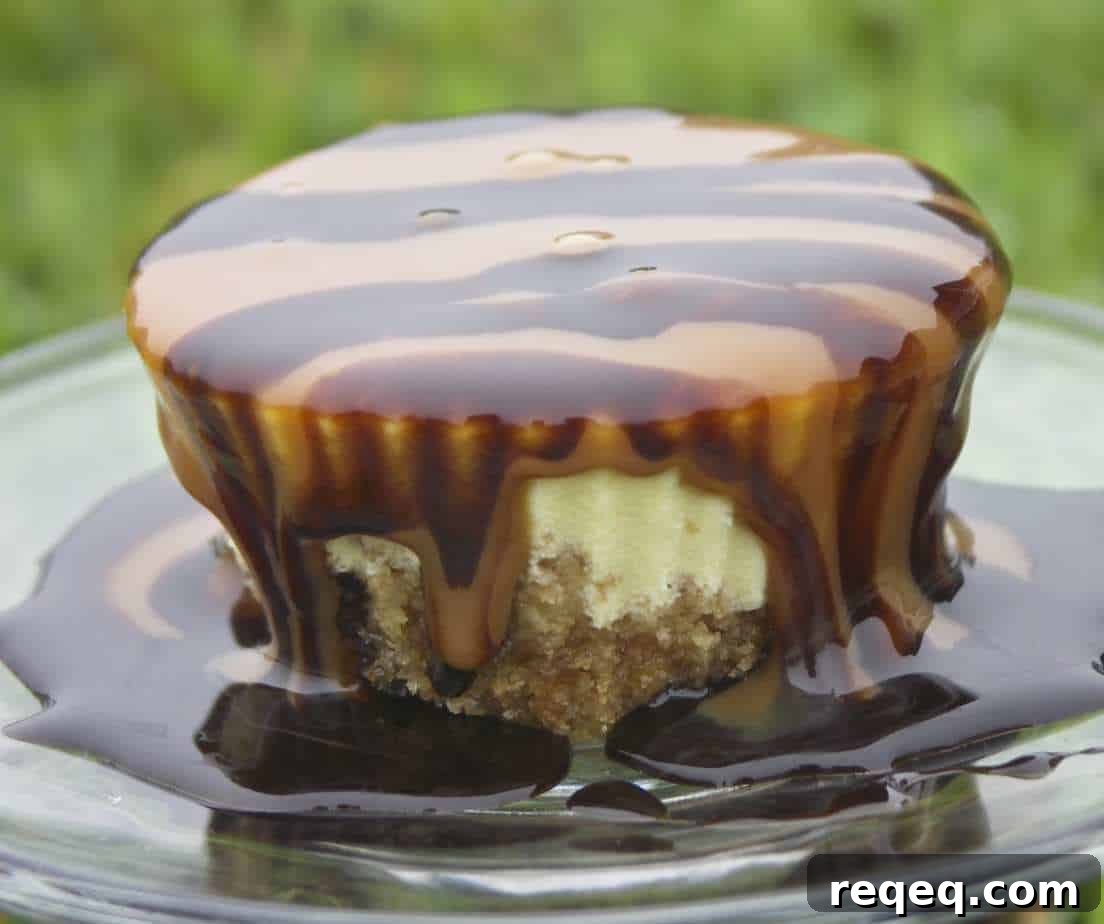
Smothered with dulce de leche and drizzled with warmed hot fudge.
Plain and simple—still irresistible.
To freeze leftovers: wrap cheesecakes individually in plastic wrap while still in their cups or after unmolding. Place them on a cookie sheet in the freezer until firm, then transfer the wrapped portions to a zipper-top bag. Freeze for up to one month for best quality, though they can be kept longer with some loss of texture.
To serve previously frozen cheesecakes: remove from the freezer and wrapping, then thaw loosely covered at room temperature for about an hour or refrigerate overnight until fully defrosted and ready to enjoy.