

Visit our Bread Recipes page for more wonderful homemade bread recipes!

I have a little indulgence I allow myself whenever I go on a proper grocery run. By that I mean the kind of trip where my husband stays home with the boys so I don’t have to field requests for everything from Japanese rice crackers to neon cereals to a giant ham—or the comedic idea of buying adult diapers to wear over our pants to youth group. When I go solo I like to hit several stores: Aldi for bulk staples (I inevitably seem to buy a suspicious amount of tuna and chili beans), then Wal‑Mart for household basics, and finally Wegman’s for beautiful produce, good meats, olive oil and one small treat for myself: a crusty olive roll from the bakery.
I love those crusty rolls, but they’re often so firm that they’re awkward for piled-high sandwiches—the kind I prefer. I wanted sandwich bread with those briny, flavorful olives evenly distributed through the crumb, soft enough to hold fillings without requiring extra jaw work. So I made them myself.
The result was delightful: a chewy outer crust, a tender, yielding crumb inside, and plenty of oil‑cured olives to satisfy any olive lover. The secret to getting bakery-style round rolls with a smooth top is in the shaping. There’s a simple forming technique that creates that taut, attractive surface while keeping some olives peeking through.
These rolls are versatile: they make fantastic sandwich vehicles, and they’re also wonderful for mopping up pasta sauce or serving alongside roasted turkey or chicken with cheese and crisp lettuce. My sister suggested piling them high with garden vegetables—perfect for dreaming of spring. I’ll be using these rolls for another recipe soon that features feta and roasted garlic, so it’s handy to have a batch on hand.
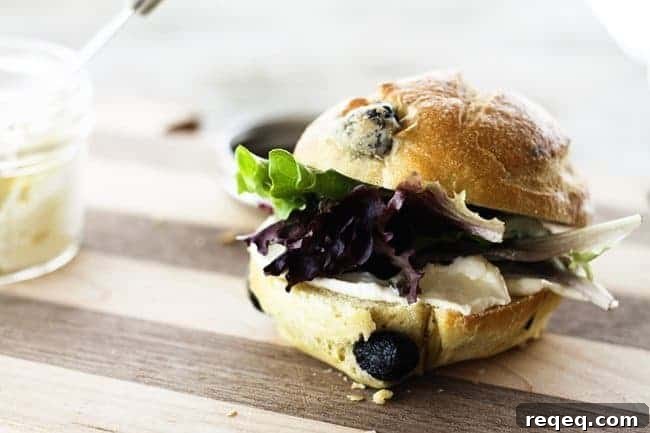
Black Olive Sandwich Rolls
Rebecca Lindamood
Pin Recipe
Ingredients
- 4 cups all-purpose flour (about 1 pound, 1 ounce by weight)
- 2 cups semolina flour (about 11½ ounces by weight)
- 3 teaspoons SAF or instant yeast
- 3 teaspoons kosher salt
- 2 tablespoons sugar
- 4 tablespoons extra virgin olive oil
- 2 cups lukewarm water (16 ounces)
- 1 1/2 cups pitted oil-cured or kalamata olives, coarsely broken by hand
- 1/2 cup water (for glaze)
- 1/2 teaspoon cornstarch
Instructions
To Mix Dough By Hand:
- Add all ingredients except the olives, cornstarch and 1/2 cup of the water to a large mixing bowl. Stir with a sturdy wooden spoon until a shaggy but cohesive dough forms. Cover with a clean towel and let rest 30 minutes. Turn onto a lightly floured surface and knead until smooth and elastic, about 10 minutes. Transfer to a clean bowl, cover with a damp towel and let rise in a warm, draft‑free place until doubled, about 2 hours.
To Mix Dough By Stand Mixer:
- Place all ingredients except the olives, cornstarch and 1/2 cup of the water into the mixer bowl fitted with the dough hook. Mix on the lowest setting until a shiny, elastic dough forms. Remove the bowl, cover with a damp towel and let rise in a warm, draft‑free place until doubled, about 2 hours.
To Mix Dough By Bread Machine:
- Add all ingredients except the olives, cornstarch and 1/2 cup of the water to the bread machine pan fitted with the dough paddle. Select the dough setting and start. When the cycle finishes, proceed to shaping.
To Shape the Rolls:
- Line two baking sheets with parchment or silicone mats and set aside.
- Turn the dough out onto a very lightly floured surface or silicone mat. Roll into a rectangle roughly 12×18 inches. Scatter the olives over the dough, leaving about an inch free on the far edge.
- Gently lift the edge closest to you and fold it away over the olives. Continue to lift and roll the dough away from you until you form a long tube. Pinch the seam closed and cut the tube into 16 equal pieces.
- To shape each roll, hold a piece with the cut sides facing out. Use your thumbs to pull the top of the dough over the cut sides toward the bottom, tuck that under the roll toward the center, rotate the ball a half turn and repeat. Cup your hand around the ball and rotate in one direction until the top is taut. Place on the prepared baking sheets, leaving room for expansion.
- Cover with a tea towel and let rise in a warm, draft‑free place for about 30 minutes, until slightly puffy.
- While the rolls rise, whisk about 1/8 cup of the water into the cornstarch to form a paste, then whisk in the remaining water. Microwave on high 30–60 seconds or heat on the stove until the mixture turns glassy; this forms a thin glaze.
- Preheat the oven to 400°F. Brush the rolls with the cornstarch glaze. Use a sharp knife to make three or four shallow cuts (about 1/8 inch deep) across the top of each roll—scallops or a small grid both work. This lets the rolls expand without tearing the smooth top.
- Bake 23–26 minutes, or until deep golden brown. Transfer to a wire rack and cool completely before slicing. Rolls keep up to three days.
Nutritional information is an estimate and provided as a courtesy. Calculate nutrition using the specific ingredients you use with your preferred nutrition calculator.
Did you make this recipe?
Tag @foodiewithfam on Instagram and use #foodiewithfamily so the author can see your photos.