


Today I’m sharing a clear, practical guide for making one of my favorite versatile ingredients: ghee. Whether you already know it or are hearing the name for the first time, ghee is simple to make and transforms the flavor of many dishes. Think of it as concentrated, toasted butter in a jar.
What is Ghee?
Ghee (pronounced “gee” with a hard G) is clarified butter that’s been cooked slowly until the water evaporates and the milk solids separate and toast. What remains is pure, golden butterfat with a rich, nutty, caramelized aroma and flavor.
Why Make Ghee?
There are many reasons to keep ghee on hand:
- Flavor: Ghee adds a deep, toasted-butter note to eggs, sautés, roasted vegetables, seared meats, oatmeal, and bread. It’s not limited to Indian cuisine—use it anywhere you want rich butter flavor.
- High smoke point: Clarifying butter raises its smoke point dramatically (far higher than regular butter), so ghee tolerates high-heat cooking like searing and frying without burning.
- Longer shelf life: Properly made and stored, unopened ghee can last many months at room temperature; once opened it keeps well refrigerated or frozen for even longer.
- Culinary tradition: Ghee is essential in many regional cuisines—Indian, Middle Eastern, Persian, and others—and versions of clarified butter appear in French and German cooking.
- Digestibility: Because the process removes most lactose and casein, some people with sensitivity to dairy find ghee easier to tolerate (not suitable for those with true dairy allergy).
- Compatible with real-food diets: Ghee is widely used in paleo, GAPS, and whole-food approaches as a preferred cooking fat.
How to Make Ghee at Home
Making ghee is straightforward: melt unsalted butter gently and let it cook on very low heat for several hours. The goal is a slow, steady simmer—not a boil—so the milk solids separate and brown without scorching. Stir occasionally and skim any foam from the surface; that foam is delicious on toast.
When the butterfat is clear, deep golden, and smells nutty, and you see toasted solids collecting on the bottom, strain the liquid through a fine-mesh sieve lined with muslin, a flour-sack towel, or cheesecloth into heat-safe containers. This removes solids and helps the ghee keep longer.
Making a large batch is efficient: if you’re going to render butter for hours, render as much as you need so the energy used yields more ghee to store.
Starting Ingredients and Equipment
Always start with fresh, unsalted butter. Unsalted butter tends to be fresher and avoids concentrating salt during the reduction process. Use a large, heavy-bottomed stockpot or soup pan to maintain even heat and reduce the risk of scorching as milk solids settle.
Cook’s Notes
- Use fresh, unsalted butter for the best flavor and predictable results.
- A heavy-bottomed pan helps prevent hot spots and burning.
- Stir occasionally, scraping the bottom gently so the solids don’t cement and scorch.
- Expect volume loss of roughly 20–30% as water cooks away (exact yield depends on initial butter moisture).
- Ghee is done when the liquid is clear and golden, it smells nutty, and toasted solids have formed on the pan bottom. Any foam on top will be removed when you strain.
Storage
You can store unopened ghee in a cool, dark cupboard for many months. Once opened, keep it in the refrigerator or freezer for longer-term storage—especially in warm or humid climates. If you plan room-temperature storage, sterilize your jars first for best shelf stability. Many preservation authorities recommend freezing for the longest shelf life.

How to Make Ghee
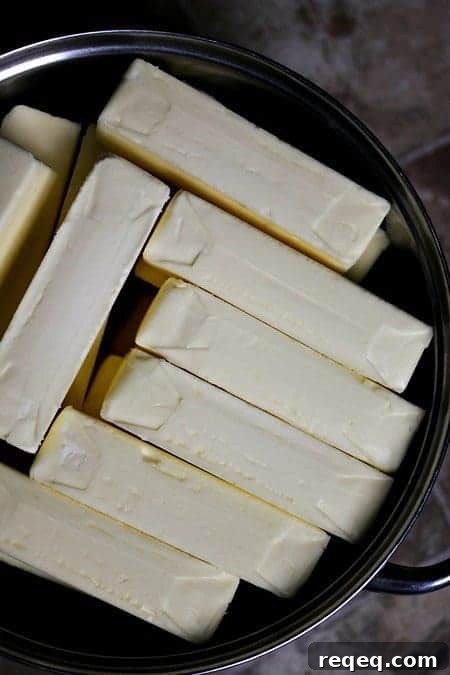
Unwrap and add all the unsalted butter to a large, heavy-bottomed stockpot. Place the pot over the lowest heat you can manage on your cooktop. If you have a low-powered simmer burner, that’s ideal.
Melt the butter and let it cook gently for 4–6 hours, stirring occasionally, until a layer of clear, deep-golden butterfat forms and toasted solids collect on the bottom. Do not boil; maintain a very low simmer so the butter percolates slowly.
Line a fine-mesh sieve with a clean piece of muslin or a flour-sack towel (or use a colander lined with double-thickness muslin). Position the lined sieve over a heatproof pitcher or bowl and ladle the clarified butter through it. Pour the strained ghee into sterilized jars, leaving about 1/2 inch headspace. Wipe rims, seal lids, and let cool completely before labeling and storing.

Homemade Ghee: How and Why You Should Make It, and What It Is
The long, slow cooking concentrates a nutty, toasted butter flavor. This method emphasizes making larger batches to get the most yield from your time and energy.
Ingredients
- 4 to 10 pounds unsalted butter (or an amount suited to your needs)
- Sterilized jars with tight-fitting lids (canning jars with new lids recommended)
- 1 large heavy-bottomed stockpot
Instructions
- Unwrap and add all the butter to a large, heavy-bottomed stockpot. Place it over the lowest heat setting you can manage. Melt the butter and cook for 4–6 hours, stirring occasionally, until the liquid is clear and deep golden and toasted solids collect on the bottom. Maintain a very low simmer—do not boil.
- Line a fine-mesh sieve with muslin or a flour-sack towel, and set it over a heatproof pitcher or bowl. If you don’t have a fine sieve, line a colander with double-thickness muslin. Ladle the ghee through the lined sieve to remove solids.
- Pour the strained ghee into sterilized jars, leaving about 1/2 inch headspace. Wipe the rims, secure lids, and let the jars cool completely before labeling and storing.
Nutrition (estimate per serving)
Calories: 203 kcal | Fat: 22 g | Saturated Fat: 14 g | Cholesterol: 60 mg | Sodium: 202 mg | Potassium: 6 mg | Vitamin A: 710 IU | Calcium: 7 mg
These values are estimates. Calculate nutrition using the exact ingredients you use if you need precise numbers.
Did you make this recipe?
Share your results on social platforms if you like—tag the creator on Instagram or use your preferred hashtag to show photos of your batch.