
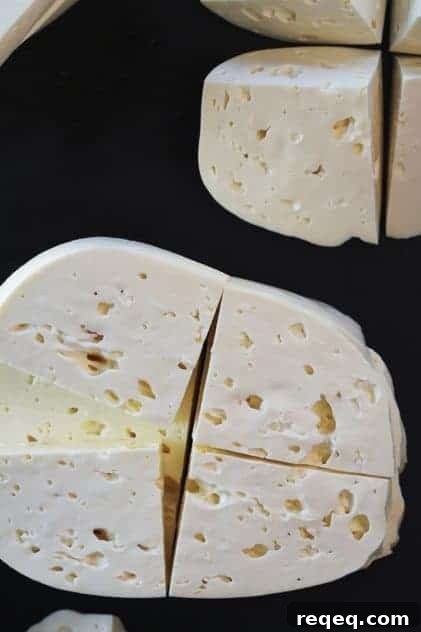

I’ve finally shared my homemade feta cheese recipe. Why make feta from scratch? Because it tastes fantastic and because it’s satisfying to do something a little daring. Beyond the flavor, homemade feta delivers a rewarding sense of accomplishment you won’t get from store-bought cheese.
There’s also a practical reason: three gallons of milk (pasteurized or raw, cow or goat) plus a few inexpensive ingredients will yield a large amount of feta—often enough to fill a gallon jar of brined cheese. The cost is modest compared to the value of the finished product, and even if your first batch doesn’t come out perfectly, you can repurpose it in other ways.
I’ll get straight to the instructions, but a few important notes first:
- Stay calm. Cheesemaking seems intimidating but is straightforward when you follow the steps.
- Allow plenty of hands-off time. The process can smell strong at times; that’s normal. Cheese making is essentially guiding milk to transform in a controlled way — if it “goes bad” the right way, it becomes delicious.
- Essential equipment: a large non-reactive pot (stainless steel), a heat source, a long knife or offset spatula, a colander, something to hang the curds from, and butter muslin (super-fine cheesecloth). Regular grocery store cheesecloth is usually too coarse; look for butter muslin.
- Milk options: raw or pasteurized/homogenized, cow or goat — all work. Goat milk is naturally tangier.
- If you use cow milk and want a tang similar to goat feta, consider adding a small amount of lipase powder. Lipase adds that characteristic bite of feta; it’s optional.
- Rennet and mesophilic culture are required. Use proper cheesemaking rennet rather than baking or custard rennet products. Vegetarian rennet options are available if preferred.
- Start around midday so you can complete Day One steps before evening.
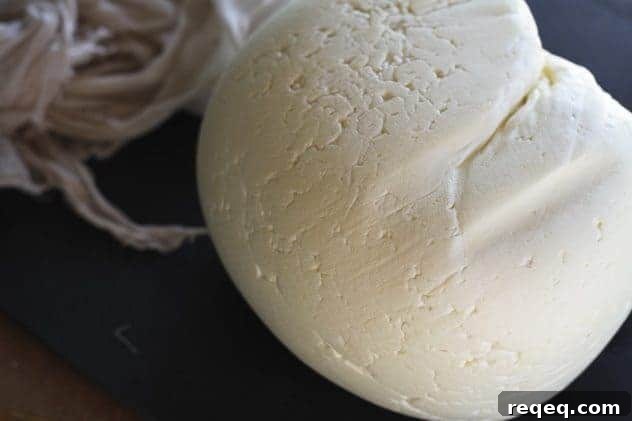
Imagine a gallon jar of fresh feta: use it on pizzas, in spanakopita, salads, baked potatoes, soups, omelets, or simply with olives and bread. The possibilities are endless.

Homemade Feta Cheese | Make Ahead Mondays
Rebecca Lindamood
Ingredients
For the Cheese:
- 3 gallons fresh raw or pasteurized and homogenized goat or cow milk
- 1/4 teaspoon mesophilic culture
- 1/4 teaspoon lipase powder (optional — recommended if using cow milk)
- 1 teaspoon single-strength liquid rennet dissolved in 1/2 cup cool unchlorinated water
- kosher salt no substitute
For the Brine:
- 1/2 cup kosher salt
- 1 gallon cool unchlorinated water
Instructions
To Make the Cheese:
-
Sterilize all equipment with boiling water before starting, including the butter muslin or cheesecloth.
-
In a very large non-reactive pot, warm the milk to 86–88°F (30–31°C). Add the mesophilic culture and the lipase (if using). Stir gently up and down, cover, and let the milk rest for one hour, keeping the temperature steady. If needed, place the pot inside a larger pot with an inch of hot water to help regulate temperature.
-
After one hour, add the dissolved rennet and stir vigorously for 15–20 seconds. Cover and let the milk sit undisturbed for 30–40 minutes, until a clean break forms when you insert a knife and lift the curd.
-
Cut the curd into a 1/2-inch grid. The curd shifts while you work, so don’t worry about perfection; aim for roughly uniform pieces.
-
Hold the knife at a 45° angle and retrace the cuts to produce mostly 1/2-inch pieces. Pieces that remain larger will break up later. Do not stir yet.
-
Let the curds rest undisturbed for 10 minutes.
-
After 10 minutes, stir gently to break up any remaining large pieces. Aim for most pieces to be around 1/2 inch.
-
Maintain the curd at 86–88°F for 45 minutes, stirring occasionally so curds don’t stick together. The curds will firm up and release whey during this time.
-
Dampen the butter muslin and line a large colander with it. Position the colander over a pot to catch whey for baking or other uses.
-
Carefully ladle the curds and whey into the lined colander.
-
Gather the four corners of the cloth to form a bag and tie securely. Hang the bag over a sink, bowl, or pot so it can drain freely.
-
Let the cheese drain at room temperature for 3–4 hours. Then lower the bag, untie it, and you’ll see the cheese smooth on the bottom and spiky on top.
-
Flip the curd so the spikes are on the bottom, retie, and rehang the bag. Let it drain for 24 hours.
At this stage the cheese may develop a noticeable aroma. That’s normal — keep going.
-
After 24 hours, remove the cheese from the bag and place on a sterilized cutting board. Cut into blocks roughly the size of a deck of cards and about 2 inches thick.
-
Generously sprinkle kosher salt on all surfaces of the cut cheese. Transfer the pieces to a sterilized, food-safe container with a tight-fitting lid.
-
Let the salted cheese rest at room temperature (do not refrigerate) for 2–3 days so it can continue releasing whey and firming up. This helps preservation.
To Prepare the Brine and Store the Cheese:
-
Pour the collected whey into a sterilized, food-safe container and arrange the cheese blocks in it.
-
Heat the gallon of cool water with 1/2 cup kosher salt in a non-reactive pot and stir until the salt dissolves. Allow the brine to cool to room temperature before pouring it over the cheese. Seal the container and refrigerate.
-
Age the cheese at least two weeks before eating. When submerged in brine and refrigerated, it will keep for up to a year and will develop a stronger flavor as it ages.
Notes
An alternative is to set the pot on a warm (not hot) heating pad to maintain steady temperature during cooler months.
Nutrition
Nutritional information is an estimate. Calculate values using your actual ingredients if needed.
Did you make this recipe?
Tag @foodiewithfam on Instagram and use #foodiewithfamily so I can see your results!